New cPanel feature – Backup User Selection
cPanel & WHM are a powerful combination that allows you to quickly organize your personal web hosting business. With this duo, you can easily create and manage user accounts on your server, and customize billing and usage limits to meet each user’s requirements. In the latest version of cPanel & WHM (version 74), several new features have been introduced that are beneficial to system administrators. One of the highlights is the “Select Backup Users” feature, which enables you to manage backups for your clients.
In version 74 of cPanel & WHM, the Select Backup Users feature has been updated with a fresh new look and improved functionality. It now has a separate section with toggles and an Account Actions menu button, allowing you to enable or disable all accounts with just one click.
Select Backup Users Interface
The main advantage of this interface is that it allows you to exclude or include specific user accounts in your scheduled backups. This documentation will focus on the Select Backup Users feature.
1) Log in to WHM.
2) Navigate to the “Backup” session.

3) Select the option “Select Backup Users”.

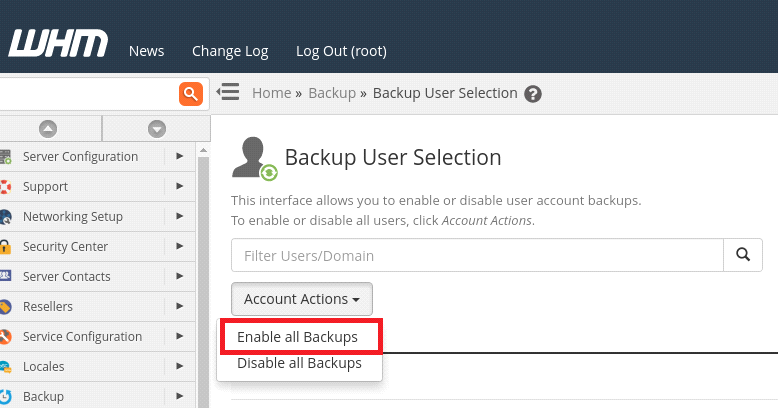
4) On the page, go to the “Account Actions” section where you can enable or disable backups for all cPanel users with a single click. If you want to enable the backup option for all accounts, select the “Enable all backups” option.

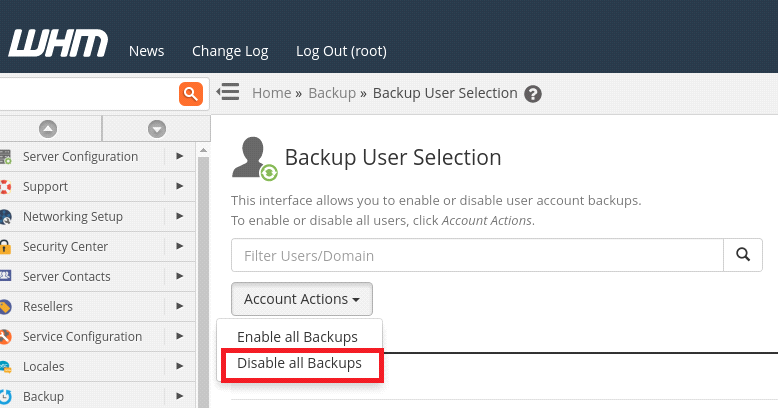
5) Alternatively, if you want to disable the backup option for all accounts, select the “Disable all backups” option.

6) You can also choose to enable/disable backups for specific users. Please refer to the screenshot below for more details on how to perform this task.

If you have configured a backup in the “Backup Configuration” section of WHM, user account information will be included in the backups by default. However, you can modify this option using this new feature.
If you encounter any issues while following this guide, please don’t hesitate to reach out to us for assistance. We are here to help!

