How to Add Google Search to Your WordPress Site
In spite of being the most popular blogging platform globally, the WordPress content management system offers limited built-in search functionalities. While there is a basic search widget included with any default installation of WordPress, individuals desiring to utilize the more advanced features of contemporary search engines, such as a personalized Google search feature, will need to take a few additional steps. This guide examines the process of installing a customized Google search function on your WordPress site. Prior to proceeding, it is necessary to have a free Google account. Furthermore, this account will grant access to other valuable Google services, like Gmail, Google Docs, and AdSense.
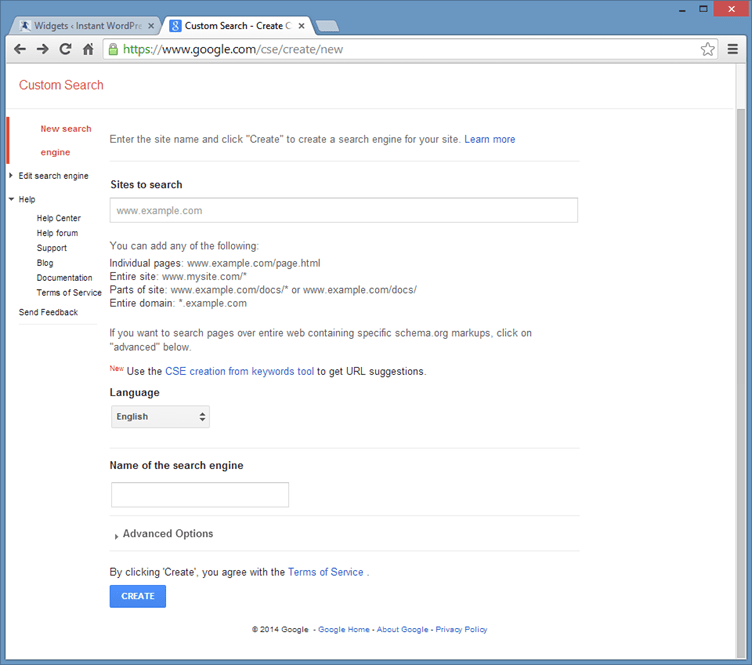
- Visit google.com/cse to access the Google Customized Search Engine website. Select “Add” to create a new customized search engine. On the subsequent page, input the URL of your WordPress website and assign a name for your customized search engine. Select “Create” to save your modifications. The newly created customized search engine will appear on your Custom Search homepage.

- Retrieve the code for your customized search engine by clicking on the search engine you recently created. Click the “Get code” button, and copy the provided code inside the gray box on the subsequent page to your clipboard.
- Inside your WordPress administrator dashboard, navigate to Appearance > Editor. Scroll down the right-side column until you locate the searchform.php file. If you do not have one, it signifies that your current theme does not include it. In this case, you will need to create a new searchform.php file utilizing a text editor such as Notepad before uploading it into the directory of your currently selected WordPress theme, using an FTP client (most web hosting companies offer a web-based FTP client).
- Paste the code from Google into your searchform.php file and select “Update File” in order to save your modifications. This action instructs the built-in WordPress search widget to utilize your Google customized search engine instead.
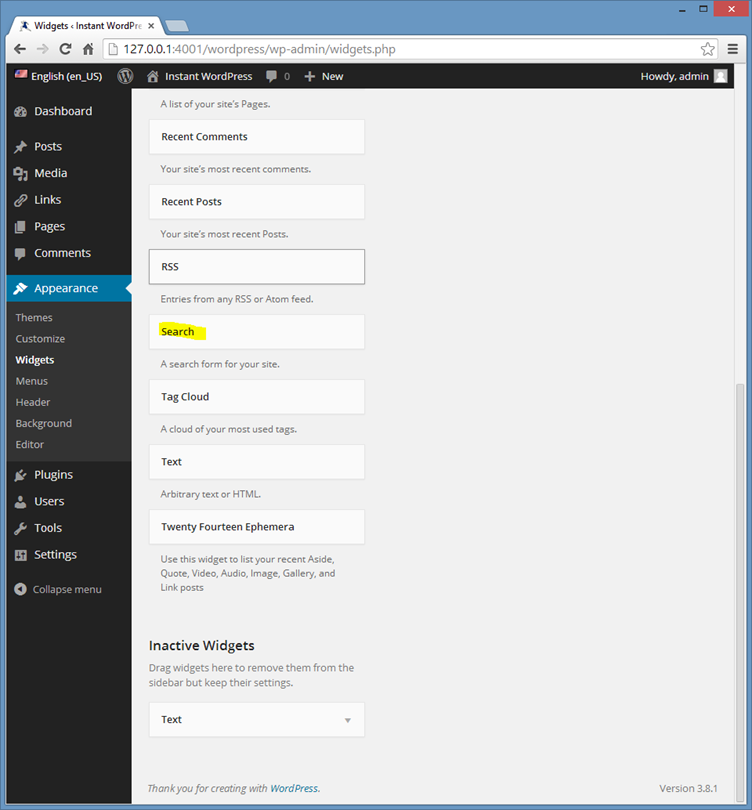
- In your WordPress administrator dashboard, access Appearance > Widgets and drag the search widget to your preferred widget area. The available widget areas vary depending on your currently activated theme.

You have the option to customize the appearance and design of your customized search engine by revisiting Google, selecting your customized search engine, and navigating to “Look and Feel.” Any alterations made to settings will simultaneously update the code.


