Create a Staging Site from WordPress Dashboard
A staging environment for a website is a productive environment used to test changes on a website that closely resembles the live environment. It is crucial to have a staging environment to test the functionality of the website before making it live. Managing a live website can be risky as it may lead to website downtime caused by plugin malfunctions, page crashes, or broken code. In such cases, a duplicate website can be used for testing and making changes in an environment that is completely hidden from visitors. A WordPress staging website is an offline copy of your website. You can easily clone your website using the WordPress plugin WP Staging. This documentation will discuss how to clone a website using the WordPress plugin.
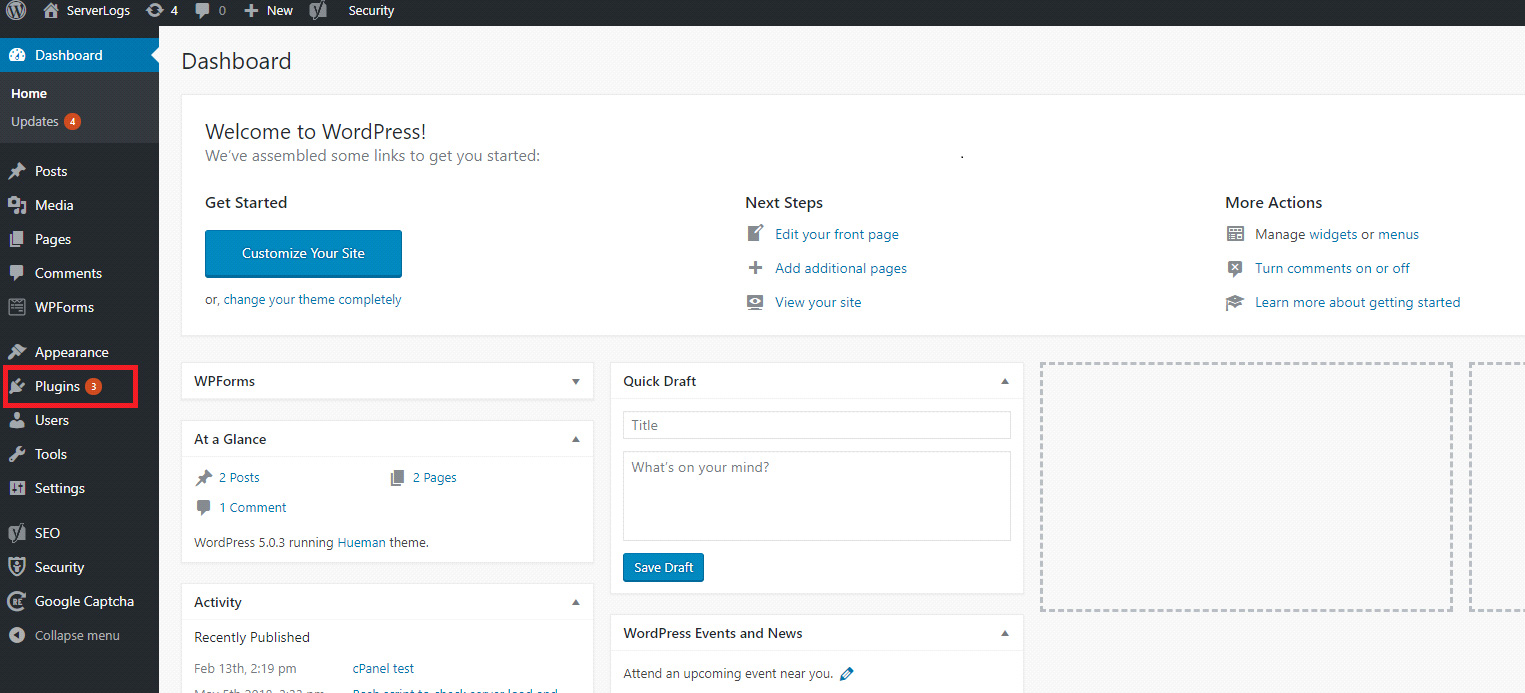
1) Log in to your WordPress Admin Panel using your wp username and password.
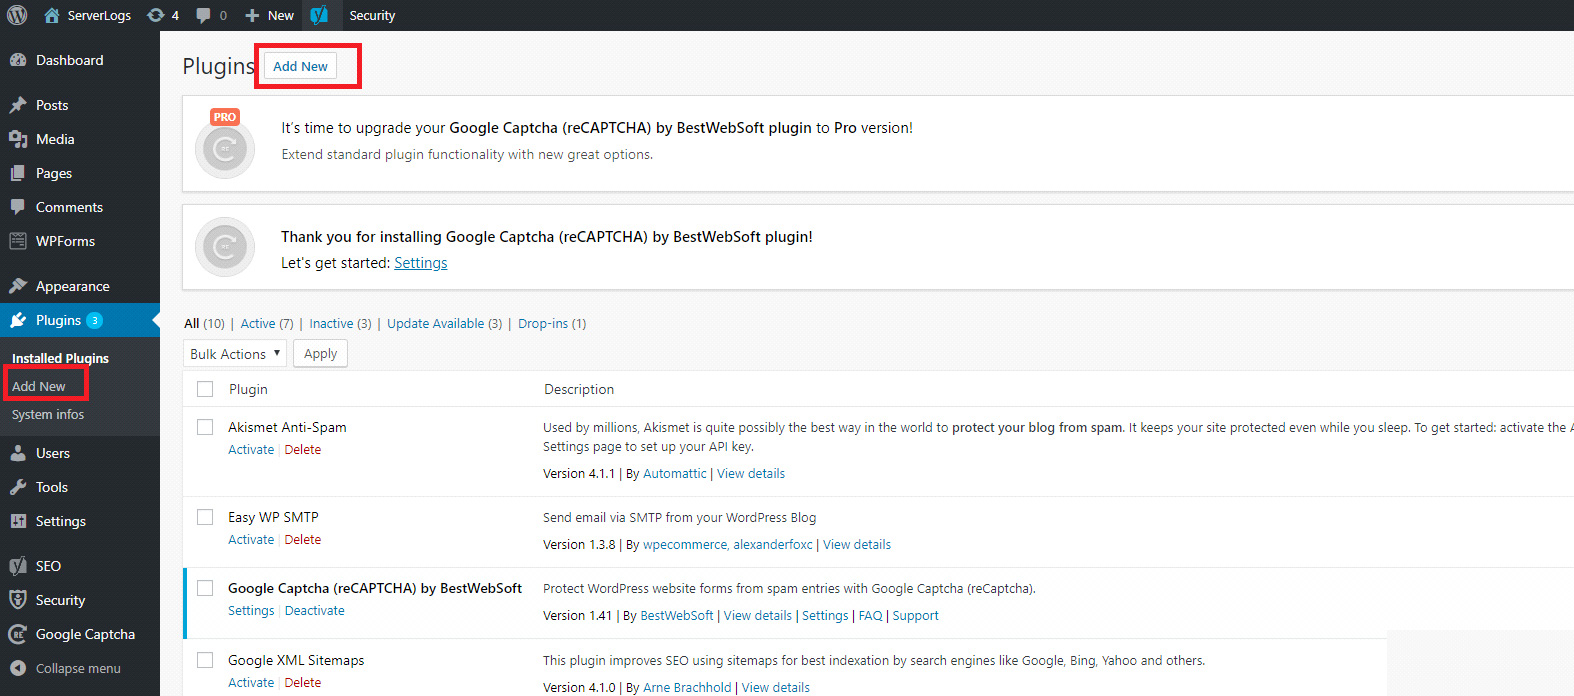
2) Go to the “Plugins” option.

3) Select the “Add New” tab.

4) Now you can search for a staging plugin from the “Search” tab on the left-hand side.

5) You will find the “WP Staging” plugin on the page. Install the plugin by clicking the “Install Now” option.

6) Once the installation is complete, activate the plugin by clicking the “Activate” button.

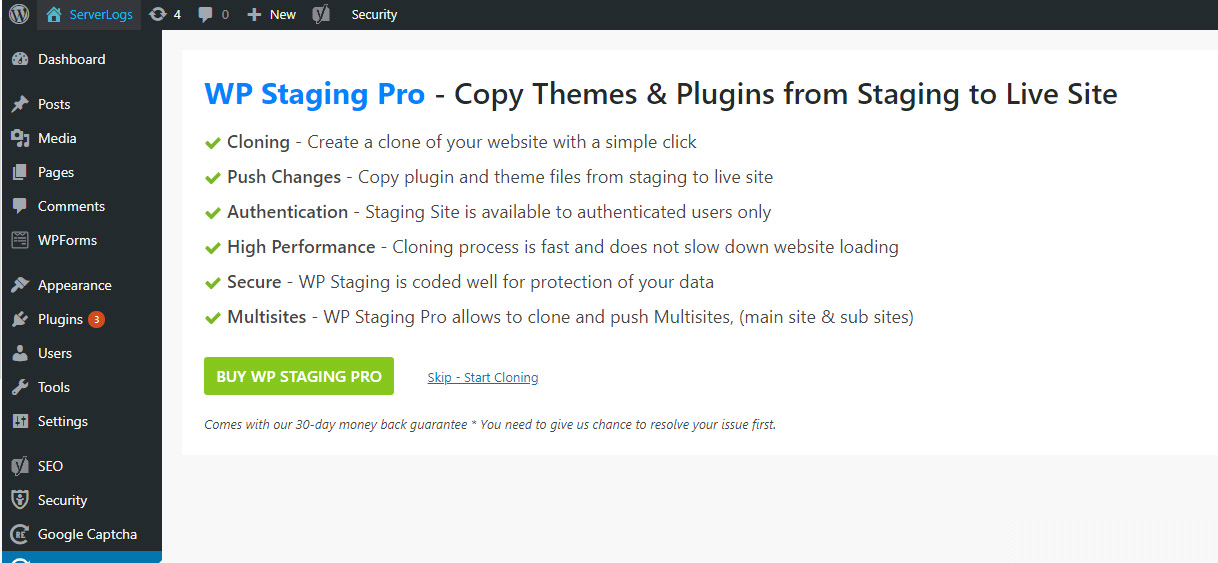
7) If you want to purchase WP staging professional, you can choose the option “Buy WP Staging Professional” on the page. Otherwise, you can select “Skip-Start Cloning” to use the free version.

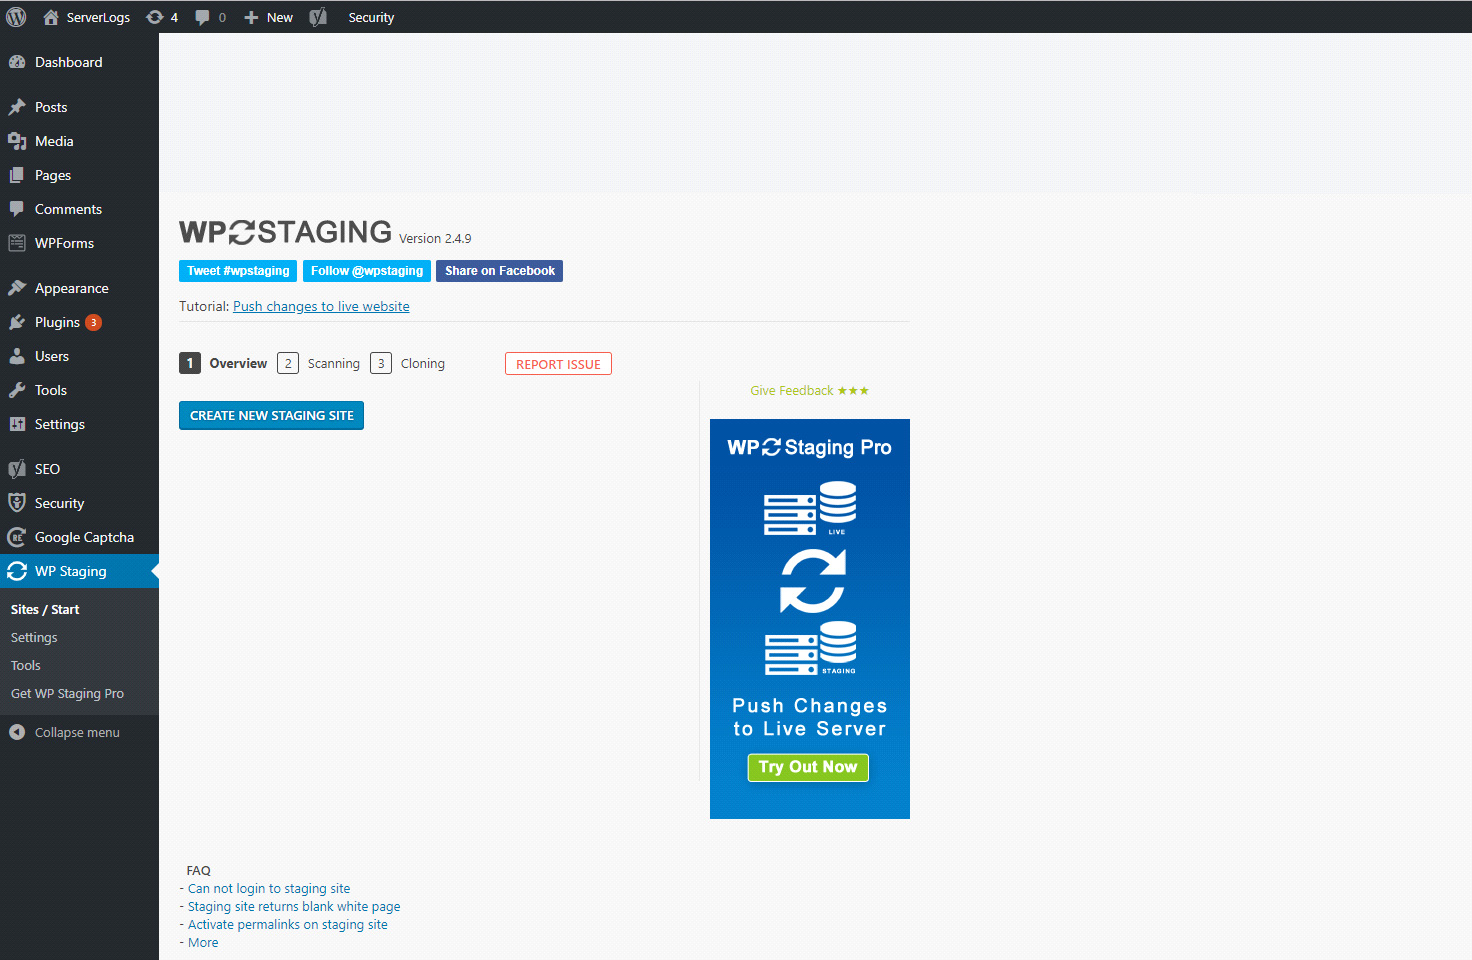
8) To start cloning your website, select the option “Create New Staging Website”.

This will redirect you to another page where you need to specify a name for your staging website and then click “Start Cloning”. It will clone your website.
If you need any further assistance, please contact our support department.

