How to Change cPanel Style
Suggestions on Modifying cPanel Appearance
cPanel is widely-used control panel worldwide and is the one provided in our shared hosting package. There is a default design for the cPanel and it will be the default appearance for your cPanel interface. However, you have the option to make your cPanel more visually appealing and customize its look by applying different styles to it. In this guide, we will explore how to modify the cPanel styles. You can make the control panel more attractive according to your preferred style.
Steps to change the cPanel design
1) Sign in to your cPanel interface. You can access your cPanel interface from a web browser by visiting the following URL.
https://youripaddress:2083
or
http://youripaddress:2082
Be sure to replace ‘youripaddress’ with your actual server IP address.
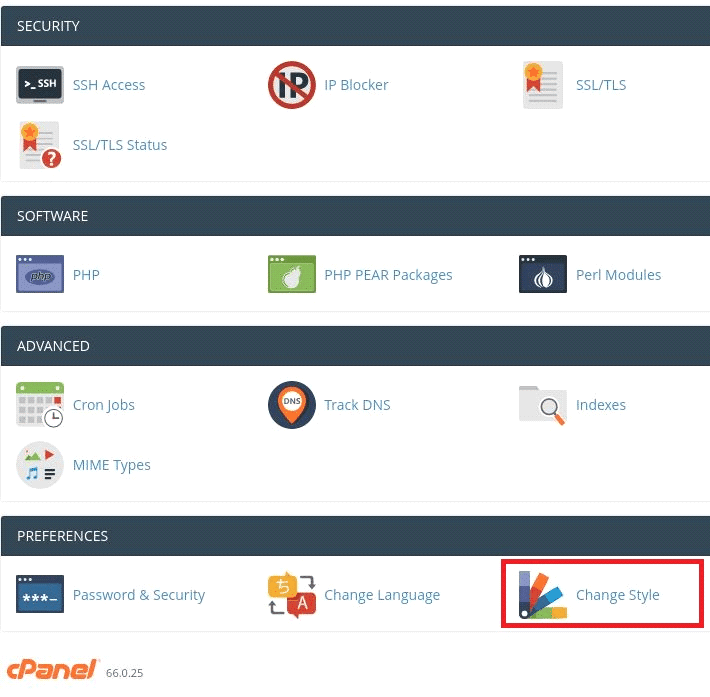
2) Now you are in the cPanel interface. You need to go to the ‘Change Style’ option. It is located under the ‘Preferences’ section. Please refer to the provided screenshot for reference.

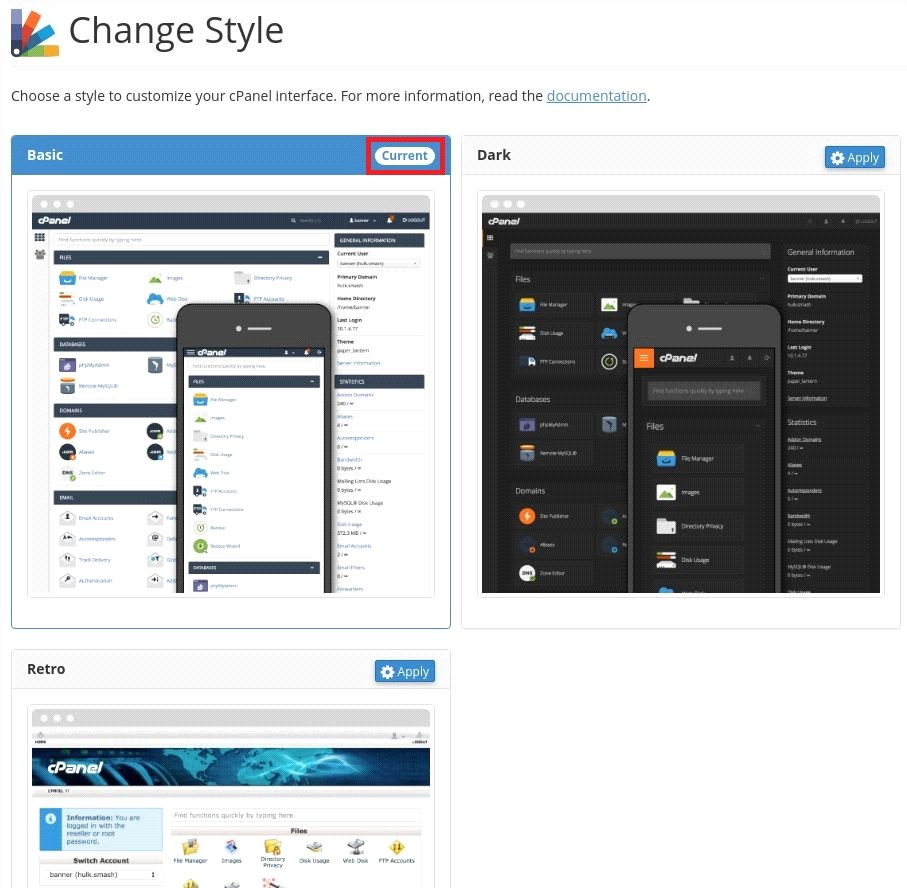
3) A new window will appear showing the available style options and the current style. It is listed below.
1) Standard Style
2) Dark Style
3) Light Style
4) Retro Style
As shown in the below screenshot, the current style of this cPanel is the Standard style.

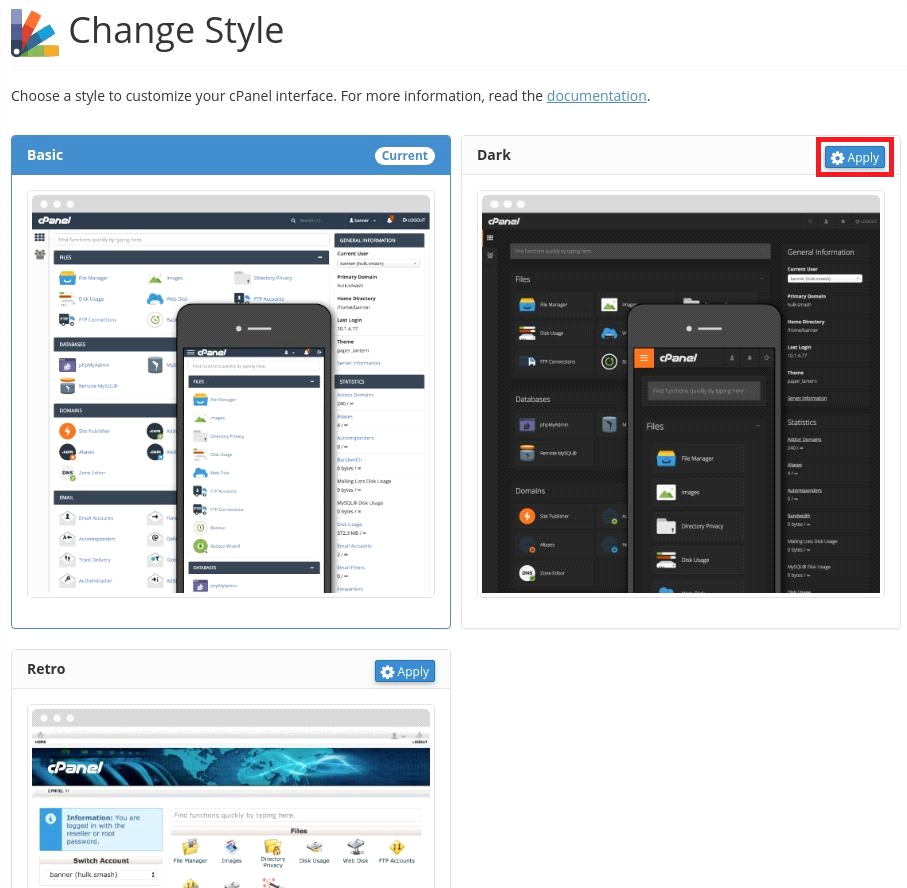
You can easily switch to another style. To switch to another style, simply click on the Apply button at the top right corner of the desired style. For example, if I want to apply the Dark style, I need to click on the Apply button at the top right of the desired style. Please refer to the below screenshot for better understanding.

This is how you can switch between the cPanel styles.
If you require further assistance, please reach out to our support department.

