How to Edit Locales in cPanel & WHM?
In cPanel&WHM, there is a feature commonly referred to as the Locale Editor interface which provides the tools to modify the languages on your server. This language editor tool allows you to modify a language’s collection of translated words through the cPanel interface. In this guide, we will discuss how to modify a language from the WHM interface.
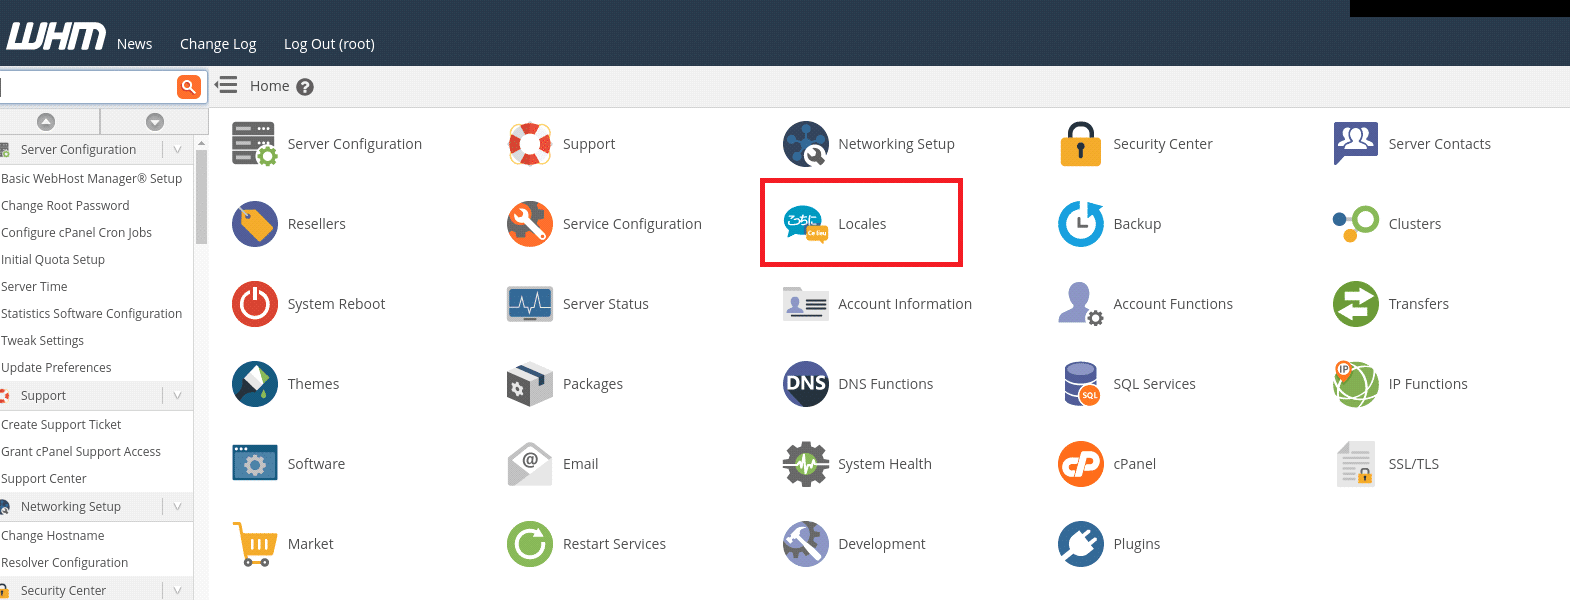
1) Access your WHM account.
2) Select the “Languages” option.

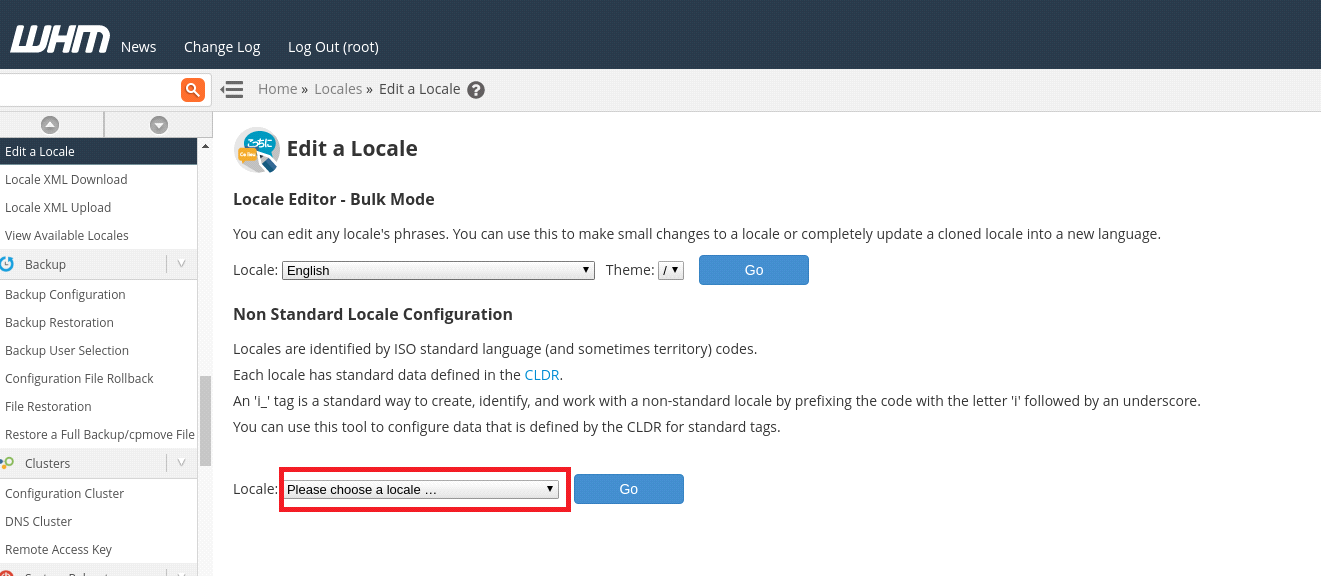
3) Choose the “Modify a Language” option under the Languages section.

4) Select a theme from the “Theme” menu.

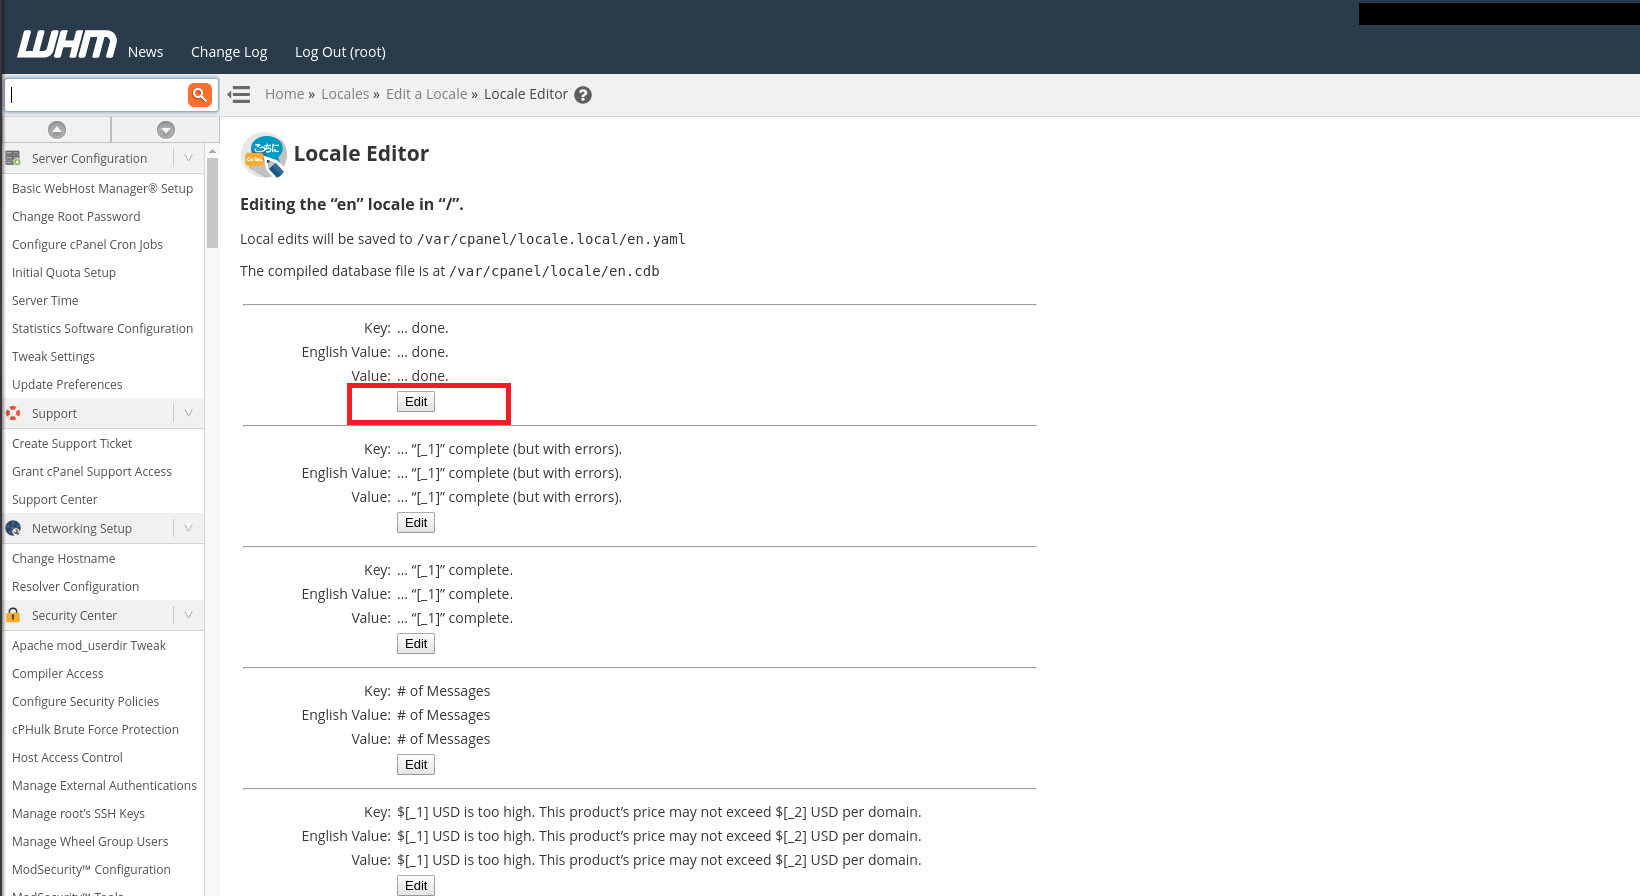
5) Click the “Go” button to proceed. This will display a new interface.
6) Click on the “Edit” button next to the word you want to modify.

7) Use the “Save Changes” button to save your modifications or select the “Cancel” option to discard the changes.

Non-Conventional Language Configuration
If you want to configure the information for a non-standard language, you can use this tool to achieve the same. Here, the system automatically adds the prefix i_ to the names of these languages because these tagged names are the standard way to create, identify, and work with non-standard languages. Please follow the steps below if you want to configure the information for a non-standard language:
1) Choose a language from the drop-down menu of the “Language” section and click the “Go” Button.

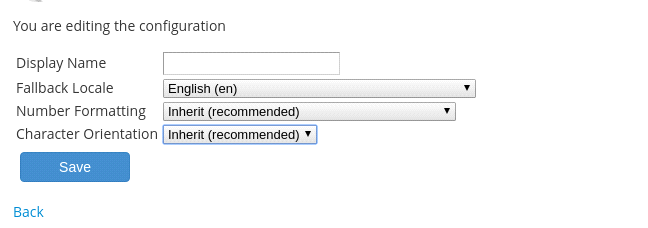
2) Enter a display name in the “Display Name” text box.
3) Customize the fallback language, number formatting, and character orientation using the corresponding menus.

4) Click the “Save” button to apply the changes.
Please note that after using this language editor interface, you need to run the following script from the command line.
# /usr/local/cpanel/bin/build_locale_databases
If you don’t run this script, your modifications will not appear in the cPanel interface until the next time the upcp script runs.
If you require any further assistance, please contact our support department.

